

Turn on enhanced conversions in Google Ads now. You can implement it through the Google tag, Google Tag Manager, or the Ads API and Data Manager, and there's no reason to wait for a bigger project window. Accept the Google Ads customer data terms, confirm a Google tag or GTM container is already firing on your site, then follow the setup path that matches your architecture. Google is folding enhanced conversions for web and leads into a single unified setting during 2026. What you build now should carry forward with minimal rework.
TL;DR:
- Setting up enhanced conversions requires accepting Google’s data terms, enabling auto-tagging, verifying your tags are live, and selecting relevant conversion actions.
- The fastest implementation method is using the Google tag with automatic detection, but GTM or API routes are better for complex forms or CRM-based conversions.
- Proper normalization, accurate CSS selectors, and testing conversions immediately after setup are essential for high match rates and effective tracking.
- Batch uploads for server-side implementations should include gclid and multiple identifiers, with a deadline of June 15, 2026, for Data Manager API migration.
- Mark new enhanced conversion actions as secondary before switching them to primary to avoid disrupting Smart Bidding with unverified data.
Table of Contents
- Enhanced Conversions Setup: What You Need Before You Start
- Which Implementation Method Should You Use?
- How to Turn on Enhanced Conversions Using the Google Tag
- How to Set Up Enhanced Conversions in Google Tag Manager
- When Should You Use API or Data Manager Instead?
- Normalization, Hashing, and the Data Fields That Actually Matter
- How Do You Validate Your Setup and Fix Common Errors?
- Rolling Out Enhanced Conversions Without Breaking Your Bidding
- Why Better Matching Actually Moves the Needle for Lead-Driven Advertisers
- Let Leapify Media Handle Your Enhanced Conversions Setup
- Sources
Enhanced Conversions Setup: What You Need Before You Start
Before touching any settings, get four things lined up. Skipping this checklist is the single biggest reason enhanced conversions implementations stall halfway through or produce garbage match rates.
- Accept the Customer Data Terms. Google Ads won't let you turn on enhanced conversions until you agree to the Google Ads Data Processing Terms at the account level. This is a one-time click, but someone with admin access has to do it.
- Enable auto-tagging. Auto-tagging appends the gclid parameter to your ad-click URLs, and that parameter is what lets Google tie a hashed email address back to the original click. Without it, enhanced conversions data has nothing to attach to.
- Confirm your tag is live. Check that a Google tag or GTM container fires sitewide, not just on the homepage. If you're going the API or Data Manager route instead, confirm you have the right credentials and developer token access.
- Pick your conversion actions. Decide which specific conversion actions (quote requests, booked appointments, form fills) need enhancement, and remove any conflicting action-level settings that might override the account-level toggle.
- Map your data fields. Walk through your actual conversion pages and note exactly where email, phone, name, and address fields sit in the DOM, and who on your team owns the code changes.
- Assign a tester. Someone needs to run test conversions after launch. Don't skip this step. It's the difference between finding a broken selector on day one versus three weeks into a stalled campaign.
Getting this groundwork right up front saves you from a much more painful troubleshooting session later.
Which Implementation Method Should You Use?
Google gives you three ways to send enhanced conversions data: the Google tag, Google Tag Manager, or the Ads API paired with Data Manager. Each one trades off speed against control, and picking the wrong one for your site setup is the most common rollout mistake.
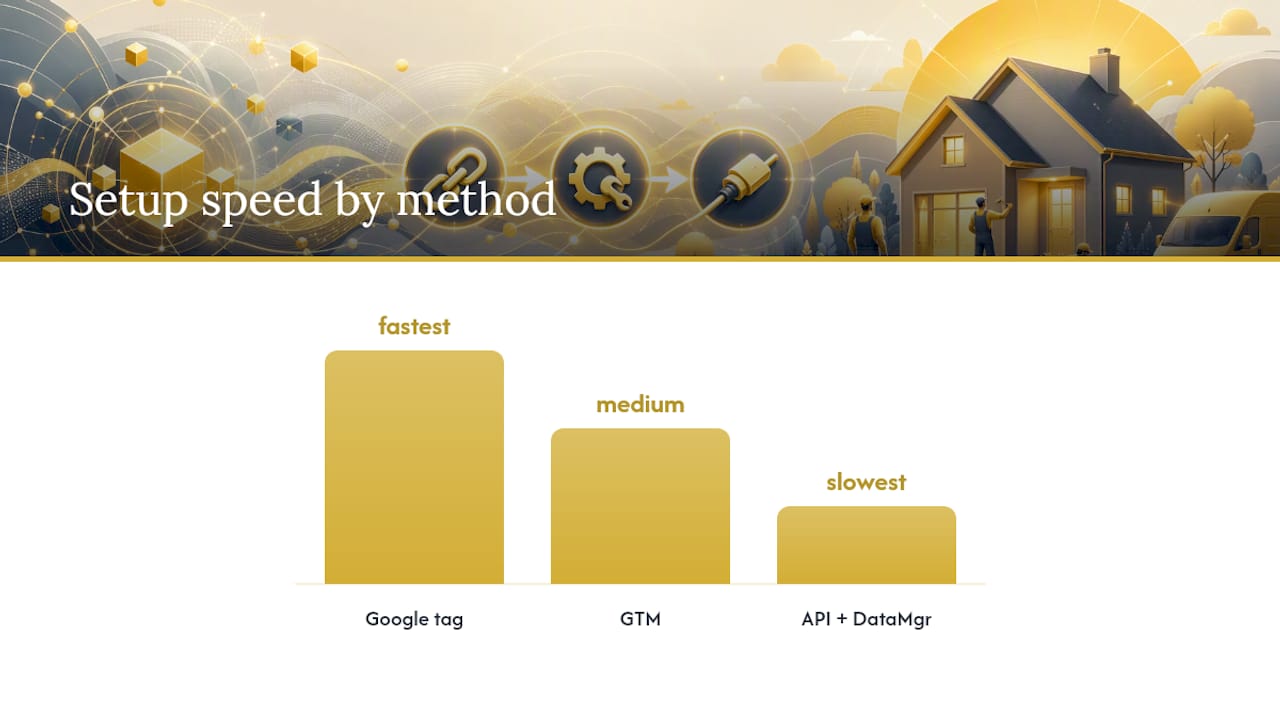
The Google tag is the fastest path. If your site already runs the base Google tag and your conversion pages show a thank-you page with visible customer data (a confirmation screen after a form submit, for instance), automatic detection often catches the email and phone fields without any extra code. This method works well for straightforward lead-gen sites with a single conversion flow.
Google Tag Manager gives you more control when your forms live behind an iframe, on a page prior to the visible confirmation, or when your data fields use unusual naming conventions. GTM lets you build a dedicated User-Provided Data variable and test it in Preview mode before anything goes live, which matters if your dev team is nervous about pushing untested code to production.
The API and Data Manager route fits businesses whose customer data lives in a CRM rather than on the page itself. If a lead submits a form but the actual conversion (a signed contract, a completed job) happens days or weeks later inside your CRM, you need server-side upload. This is also the method for bulk historical backfills and any setup requiring tighter control over exactly what gets hashed and when.
Here's a quick way to match your setup to a method:
- Forms with visible data on the confirmation page → Google tag, automatic detection
- Forms on a prior page, iframe forms, or non-standard field names → Google Tag Manager
- CRM-only PII, delayed conversions, bulk imports → API or Data Manager
Google's 2026 updates unify how user-provided data gets accepted across all three paths, and the Data Manager API migration has a hard deadline of June 15, 2026, which matters most if you're already running server-side uploads.
Pro Tip: If you're not sure which method fits, start with the Google tag and automatic detection. It takes ten minutes to test, and if match rates come back low, you can layer GTM or API uploads on top without redoing the base setup.
How to Turn on Enhanced Conversions Using the Google Tag
This is the fastest path for most home service websites, and Google walks through it in detail in its Google tag setup guide. Here's the exact sequence.
- Go to Conversions settings. In Google Ads, click Goals, then Conversions, then Settings. Find "Enhanced conversions for web" and click Turn on enhanced conversions.
- Accept the data terms. If you haven't already accepted the Customer Data Terms at the account level, you'll be prompted here. Do it now if you skipped it earlier.
- Select the Google tag as your data source. Google Ads scans your site for an existing tag. If it finds one firing correctly, you'll see a confirmation message that the tag is collecting data.
- Choose your capture method. You get three options here, and this is the decision point that matters most:
- Automatic detection lets Google scan your conversion pages and pull email/phone fields it recognizes on its own. Simplest option, works for standard HTML forms.
- CSS selectors or JS variables let you point Google Ads at the exact field on the page where customer data lives, which is more reliable when your form uses custom styling or a third-party form builder.
- Code snippet means you add a small block of JavaScript directly into your page template, giving you full control over what gets sent and how it's formatted.
- Grab your CSS selectors, if needed. Open your browser's DevTools (right-click the email field on your confirmation page, choose Inspect), then copy the CSS selector or the relevant JS variable name. Paste that into the field Google Ads provides during setup.
- Save and validate. Once you save your settings, submit a real test conversion on your own site immediately. Then check the Conversion diagnostics report in Google Ads within the next few hours to confirm the tag picked up hashed user data.
One nuance worth knowing: automatic detection works fine for many advertisers, but a manually placed code snippet or explicit CSS selector tends to produce more consistent match rates on the conversion pages that actually drive revenue. If your quote-request form is your top money page, don't leave it to automatic guessing with online ordering and Google Ads.
How to Set Up Enhanced Conversions in Google Tag Manager
If your site already runs GTM, this method gives you the cleanest audit trail and the safest testing process before anything goes live. The full walkthrough lives in Google's GTM setup guide, but here's the practical version.
- Enable user-provided data on your Google tag. Open your GTM container, find your existing Google tag (the one handling your Google Ads conversion tracking), and turn on "Allow user-provided data collection" in its advanced settings.
- Choose automatic or manual collection. Inside that same tag configuration, you'll pick between automatic collection (GTM scans the page for recognizable fields) or manual, where you define exactly which variables hold customer data.
- Build a User-Provided Data variable. Create a new variable in GTM, choose the User-Provided Data type, and either use Code mode (referencing a JavaScript object on the page) or Selectors mode (pointing to specific CSS selectors for name, email, and phone fields).
- Update your Google Ads conversion tags. Add the user_data parameter to your existing Google Ads conversion event tags, or switch to the dedicated Google Ads User-Provided Data Event tag type if your setup calls for a separate tag.
- Test in Preview mode. Before publishing anything, open GTM Preview, walk through your actual conversion flow, and confirm the user_data object populates correctly in the tag firing panel. This step catches selector mistakes before they reach production.
- Publish the container. Once Preview confirms clean data, publish. Submit one more live test conversion afterward and check the results in Google Ads diagnostics within 24 hours.
Pro Tip: Automatic collection is faster to set up but riskier on sites with inconsistent form markup across pages. If you run multiple landing pages built by different teams or agencies over the years, manual selectors take longer up front but save you from silent failures on the one page nobody remembers to check.
Manual selector configuration matters more the messier your site's history is. A five-year-old home service site with landing pages built by three different web developers is exactly the situation where automatic detection quietly misses a field on page four of your funnel.
When Should You Use API or Data Manager Instead?
Server-side implementation through the Ads API or Data Manager makes sense when your actual conversion doesn't happen on your website at all. A homeowner fills out a quote form, but the real conversion, the signed job, happens two weeks later inside your CRM after a sales call. That's a textbook case for the API route.
The high-level flow looks like this: capture the gclid and an order ID at the point of the original form submission, store them in your CRM alongside the lead's contact details, then normalize and hash the personally identifiable information before uploading. You build a ConversionAdjustment object containing the hashed identifiers and the original conversion action, then push it through Data Manager or directly via the API.
A few things improve match rates meaningfully here:
- Include the gclid whenever it's available. It's the strongest signal you can send.
- Batch your adjustments rather than uploading one record at a time. Daily batch uploads are both more efficient and easier to monitor for errors.
- Send multiple identifiers per record (email plus phone plus address) rather than relying on email alone. Redundant identifiers catch matches a single field would miss.
Timing matters here more than usual right now. Google's Data Manager API migration deadline lands on June 15, 2026, and if you're running an older direct-API integration, check your developer token permissions well ahead of that date rather than scrambling the week before.
Normalization, Hashing, and the Data Fields That Actually Matter
Every piece of customer data you send has to be normalized before it's hashed, and getting this step wrong is the single most common reason match rates come in lower than expected. For email, that means lowercasing the entire address and stripping leading or trailing whitespace before applying SHA-256 hex hashing. If you'd rather not build hashing logic yourself, you can send raw, unhashed values through the Google tag or GTM and let Google handle normalization and hashing on its end, as long as the connection uses a secure, encrypted channel.
Phone numbers need to follow the E.164 international format: a leading plus sign, country code, then the full number with no spaces or punctuation. A US number formatted correctly looks like +11231234567, not (123) 123-4567. Get this wrong and the field simply won't match, even if every other detail is perfect.
Address data is optional but valuable when you have it. Sending first name, last name, and postal code alongside email gives Google more surface area to work with, especially for advertisers whose customers use varying email addresses across visits.
| Field | Key name | Format notes |
|---|---|---|
| Email (hashed) | sha256_email_address | Lowercase, trimmed, then SHA-256 hex |
| Email (raw) | email_address | Only over secure connections; Google hashes it |
| Phone (hashed) | sha256_phone_number | international phone number format before hashing |
| Phone (raw) | phone_number | international phone number format, e.g. +11231234567 |
| First/last name | first_name / last_name | Sent alongside postal code, not alone |
| Postal code | postal_code | Pairs with name fields for matching |
Data sent through a code snippet gets prioritized over automatically detected fields, so if you've configured both, the snippet wins. That's worth knowing if you're debugging why a change to your automatic detection settings doesn't seem to affect anything.
How Do You Validate Your Setup and Fix Common Errors?
Run a real test conversion immediately after any change, and check your browser's network tab to confirm the hashed user_data object or the gclid and order_id fields are actually present in the request. Skipping this step is how broken selectors sit undetected for weeks.
Google Ads gives you two dedicated tools for this: the enhanced conversions diagnostics checklist and the Conversion diagnostics report inside your conversion action settings. Both flag specific issues rather than a generic pass or fail.
The errors that show up most often, and how to fix them:
- Missing gclid. Usually means auto-tagging got disabled somewhere, or a redirect stripped the parameter. Re-enable auto-tagging and check your redirect chain.
- Wrong hashing format. Double-check you're lowercasing and trimming email before hashing, and confirm phone numbers are in E.164 format.
- Incorrect CSS selectors. A site redesign or form-builder update silently breaks selectors more often than you'd expect. Re-inspect the field after any front-end change.
- Conversion action ineligible. Some conversion action types don't support enhanced conversions. Check the action's category and settings if it's not showing up as an option.
Google recommends marking new enhanced conversion actions as "secondary" for the first two to three weeks after launch, which keeps the fresh data from influencing automated bidding until you've confirmed it's clean.
Rolling Out Enhanced Conversions Without Breaking Your Bidding
Don't flip a new enhanced conversion action straight to primary and let Smart Bidding start learning from it on day one. Mark it secondary for two to three weeks first, and use that window to confirm match rates and data quality before it touches your bid strategy.
A few habits keep the rollout clean:
- Run daily uploads if you're on the API or Data Manager path, rather than batching weekly. Fresher data means faster error detection.
- Avoid backfilling historical conversions unless you have a specific reason to. Backfilled data can distort attribution models that weren't built to expect it.
- Include the gclid on every record you can, and add an order ID for deduplication when the same conversion might get reported from two sources.
- After roughly 30 days on primary status, review the conversion action's performance and document whether attribution shifted meaningfully, and whether bidding behavior changed as a result.
Pro Tip: Keep a simple log of the exact date you switched each conversion action from secondary to primary. When someone on your team asks three months later why a campaign's cost-per-lead shifted, that log saves you from guessing whether it was the enhanced conversions rollout or something else entirely.
Why Better Matching Actually Moves the Needle for Lead-Driven Advertisers
Richer conversion matching does something most advertisers underestimate: it changes what Smart Bidding is actually learning from, not just how much data shows up in a report. When Google can confidently tie a hashed email address back to the original ad click, modeled conversions get sharper, and that sharpness feeds directly into how aggressively (or conservatively) your bid strategy pursues similar users.
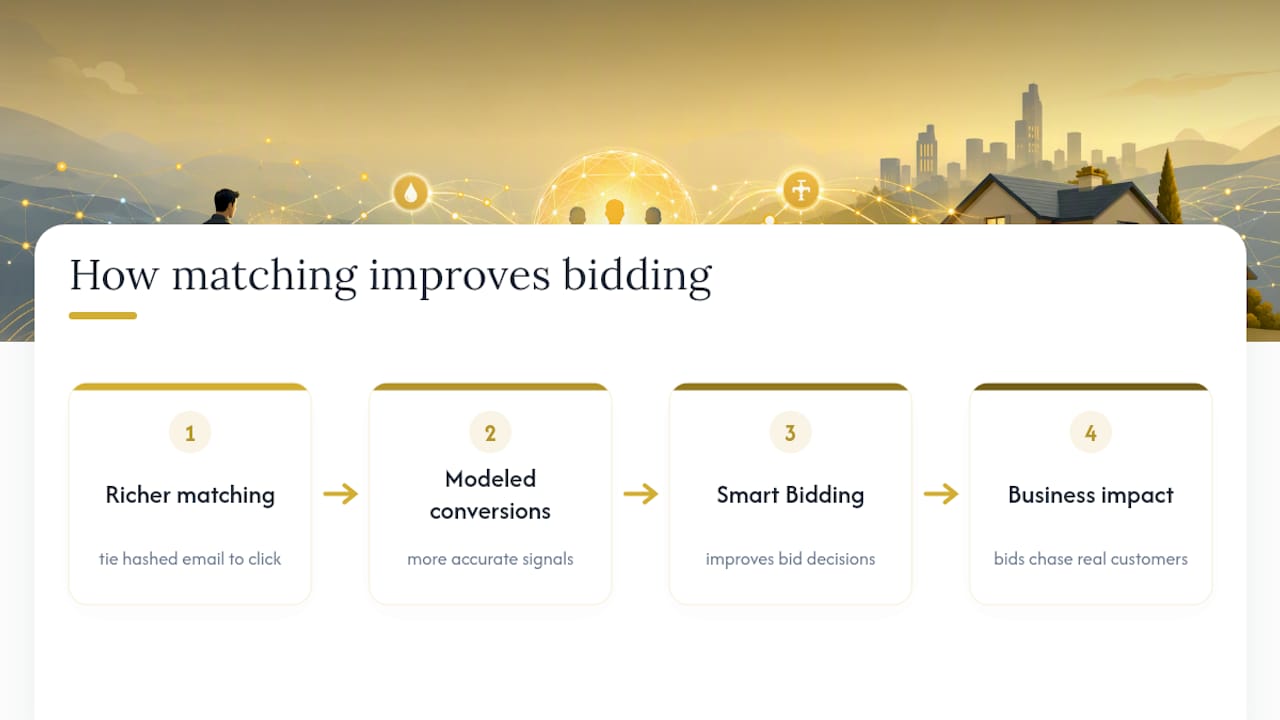
For home service advertisers specifically, the gap between a raw click and a booked job is often days or weeks, filled with phone calls and CRM handoffs that never touch your website again. That's exactly the scenario enhanced conversions was built to solve, and it's why Leapify Media leans hard on combining email, gclid, and full-session attribute data with CRM integration rather than treating enhanced conversions as a one-time checkbox. Higher match rates aren't a vanity metric here. They're the difference between a bidding algorithm chasing phantom patterns and one chasing your actual best customers.
That said, DIY implementation is completely reasonable for a business running one clean conversion flow through a single form. Where it gets genuinely hard is CRM integration, multi-location lead routing, and reconciling enhanced conversions data against a Local Service Ads setup at the same time. That's usually the point where bringing in a specialist saves more in avoided bidding errors than it costs in fees.
— Everson Gorski
Let Leapify Media Handle Your Enhanced Conversions Setup
Professional services are available offering full implementation across tagging, GTM, and CRM data imports, verified and monitored until match rates hold steady, with no guesswork about whether your selectors survived the last site redesign.
Home service businesses seek services that ensure enhanced conversions data actually connects to their CRM, call tracking, and Local Service Ads reporting in one coherent system. Some providers build that connective layer using in-house engineered tools running on proprietary servers rather than routing client data through third-party AI platforms, which matters if your CRM holds sensitive customer information. If you already run Google Ads for lead generation and want your enhanced conversions setup handled correctly the first time, visit Leapifymedia to book a consultation and see exactly where your current tracking is leaving match rate on the table.